Fine Motor Skills Activity: DIY Pinch Pots

Do you really need to have a potter’s wheel and kiln to make usable pots? Truth is that air-dry clay can produce just as nice pots and can be just fun to use. As the name suggests, air-dry clay does not need a kiln or to be oven-fired in any way.
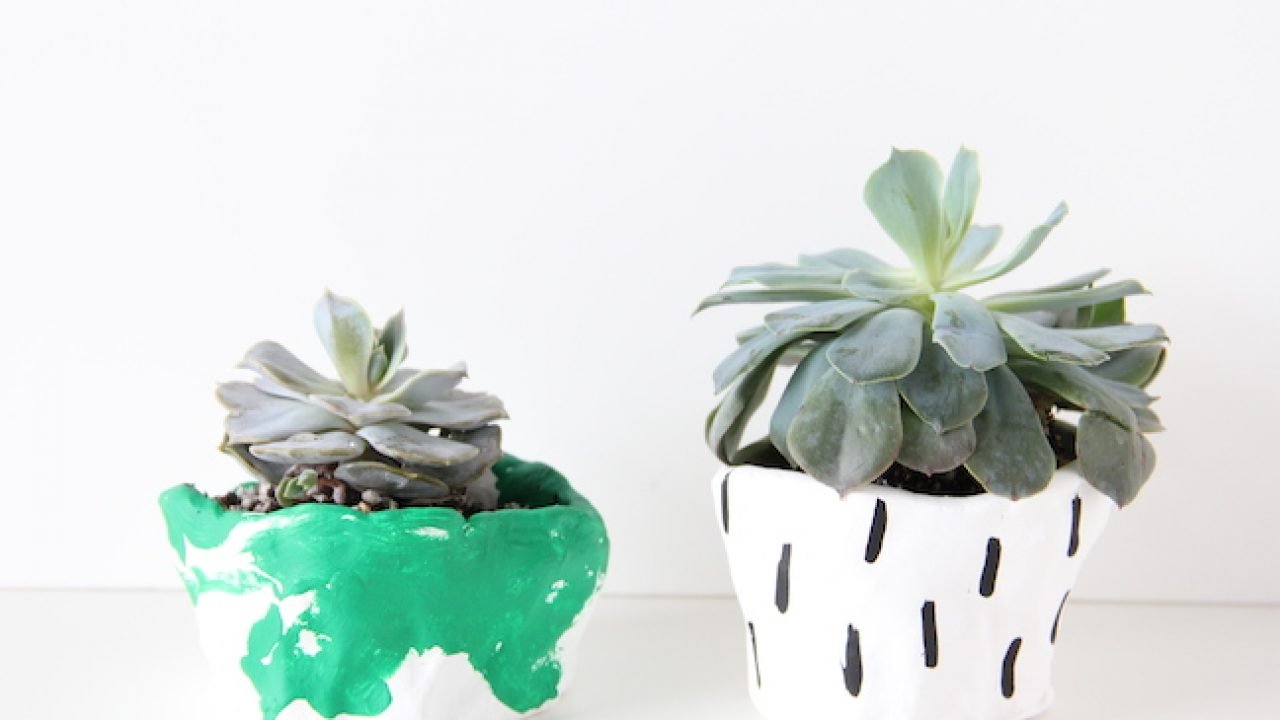
You can decorate pinch pots in just the same way as a traditional clay pot–the only major difference is that an air-dry pot is going to be a little lighter-weight than a traditional pot.
There’s so much you can do with air-dry clay and in a fraction of the time. Pinch pots are great as ring holders or as a salt pinch pot for the kitchen. You can make them into leaf shapes, monsters, or just go for that contemporary Pinterest style.

You Will Need:
- air-drying clay
- parchment paper
- Thin wire
- Acrylic paint
How to Make a DIY Pinch Pot:
- Start with a chunk of clay that’s about the diameter of one of your palms.
- Knead the clay to soften it and make it more workable.
- Once you have it soft enough to easily mold, make the clay into a ball.
- Cup the ball of clay into both hands, and press both thumbs into the middle so that they make an indent about halfway into the clay ball.
- Next, you can either use a little bowl as a mold or you can freestyle it.
- Start molding your air-dry clay into a bowl shape by gently pinching it between your thumb and forefinger.
- You can either stop once you’ve made a round bowl, or you can make it into a shape like a heart, a leaf, a monster, or anything you can think of. You can also add googly eyes or other embellishments.
- Put your creation onto a sheet of parchment paper to dry completely.
- Once dry, you can paint! Peel off the parchment paper and paint away!
Note: If you add extra pieces of clay to your bowl (like monster arms, for example), be sure to crosshatch the clay where the new piece is going as well as crosshatching the part of the new piece that will connect to your bowl.
If the clay has already started to dry out a little, you can also add a dab of water to your crosshatched sections. Once the two pieces have been gently smooshed together, smooth over the seam where they attach–again, if it’s dry, just add a little water.

About Stephen’s Place
Stephen’s Place is an independent apartment community for adults with developmental and intellectual disabilities, located in Vancouver, WA (7 minutes from Portland, OR).
If you have a loved one with developmental or intellectual disabilities, who is looking for a community to live in, please contact us for more information.
Stephen’s Place is a private-pay apartment community due to our state-of-the-art amenities and programs. We are a nonprofit and do not profit from our community. We are private pay because we spend more than some housing communities to ensure that our residents are comfortable and can safely live their lives with independence and dignity.