5 DIY Christmas Tree Ornaments

In the beginning, traditional Christmas tree ornaments consisted of dried cranberries, lollies, candles, and popcorn – the origins of which can be traced back to Estonia in the 15th century. We’ve evolved since then to really add some individuality to each person’s tree. And, now that we have Pinterest, we’re getting more fresh ideas every year. Here you shall find an eclectic mix of new and old DIY ornaments to add to your Christmas tree.
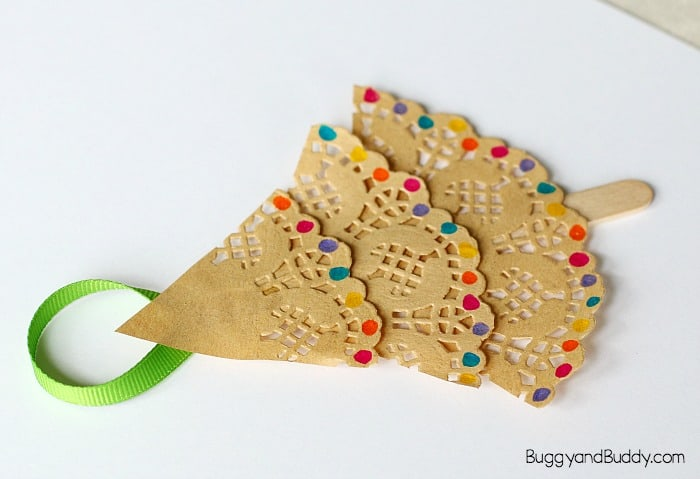
1. Christmas Tree Doilies
Making Christmas tree ornaments with doilies is great because you can color them in if you want to and further decorate them however you like. It’s a DIY ornament with at least two potential activities in one because you have both the making of the structure and the decorating of the ornament.
You will need:
- 1x 4½ inch paper doily in any color you like. Most craft stores sell them in a variety of colors and patterns.
- 1x popsicle stick
- Safe scissors
- Elmer’s glue
- Colored markers, paints, and/or glitter pens
- A 3-inch piece of ribbon (any color you like)
- A pencil
Directions:
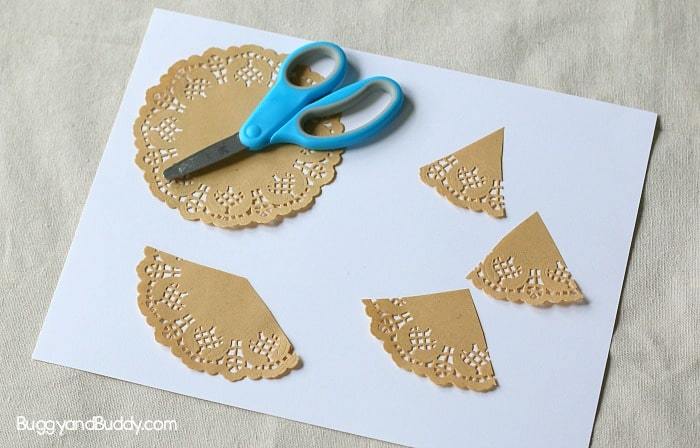
- Draw a pencil dot in the centre of your doily. It doesn’t need to be perfectly in the centre.
- Cut three triangles out of the doily by cutting from the outer edge to the centre dot. The triangles need to be three different sizes, each one a little smaller or larger than the last.
- Arrange the dioly pieces from smallest to largest.
- Glue the largest piece onto the popsicle stick with the round part facing down and the point facing upwards. Stick the piece a little ways up the popsicle stick so that it leaves part of the popsicle stick exposed to make a tree trunk.
- Take the piece of doily that is the next size down from the largest and glue it round part down and fully covering the solid part (the bit without holes) of the largest piece of doily.
- Take the last and smallest piece of doily and glue it round edge down so that it covers the solid part of the middle doily.
- Let the glue dry.
- Decorate by adding different colored dots with pen and glitter glue to make baubles. If you have little pom poms, you can add those. You can also paint it or draw on it any way you please.
- When you’re finished with decorating your doily tree ornament, fold your piece of ribbon in half and glue it to the top back of your tree.
- Let dry.
- Hang it on the tree!
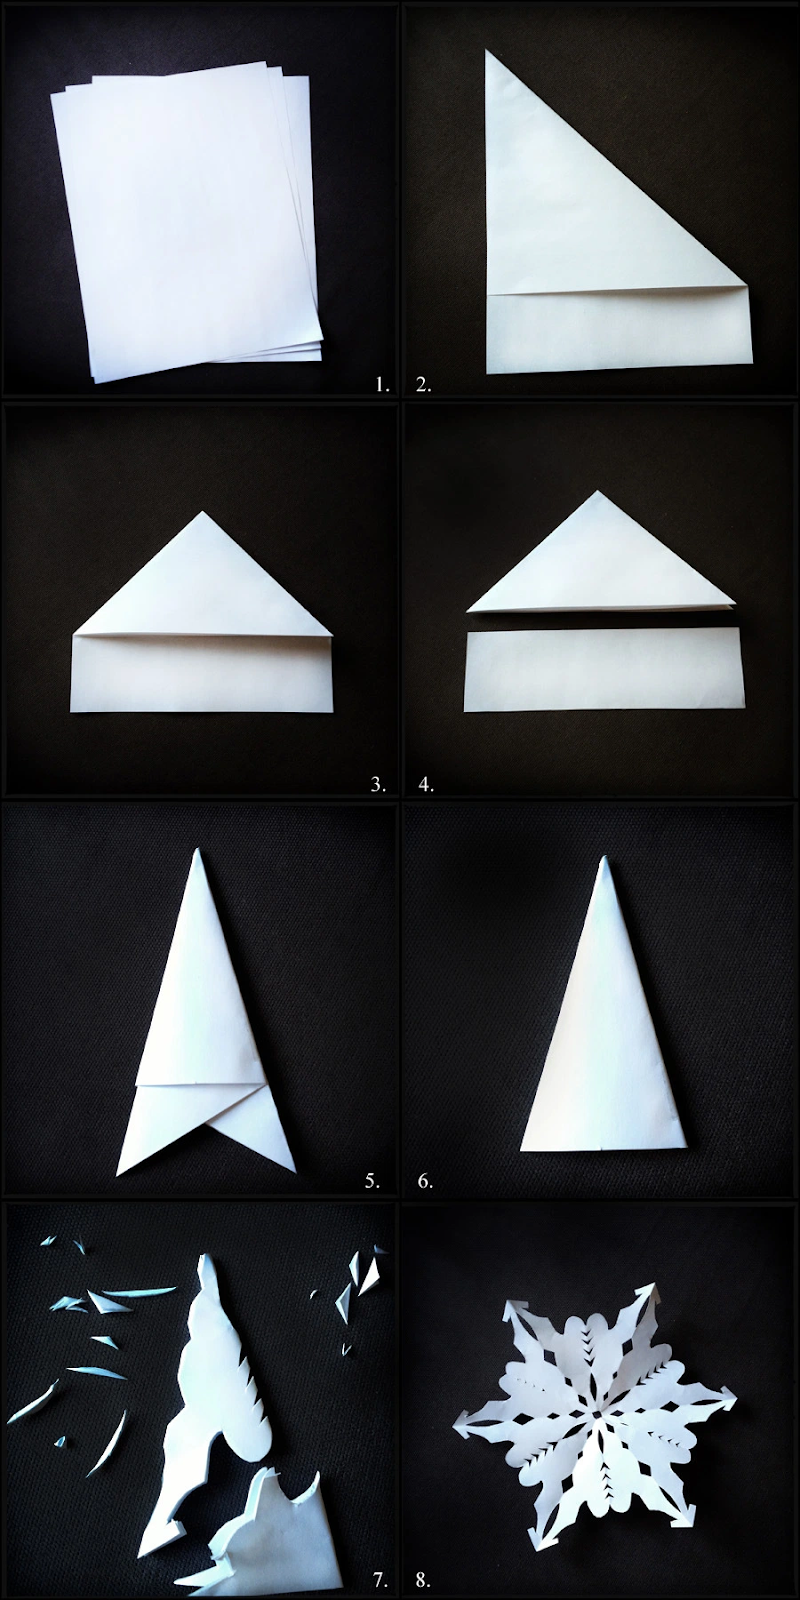
2. Paper Snowflakes
Paper snowflakes are the all-time classic DIY Christmas decoration and you can make them without having to go to the craft store. You can put them up on walls, windows or even your Christmas tree.
You will need:
- A piece of paper
- Scissors
Directions:
- As pictured, to make a square piece of paper, get your piece of paper and fold one corner over diagonally over so that the paper’s edge lines up with the edge on the other side, making a right-angle triangle with the folded piece.
- Keep the paper like this and cut off the excess rectangle.
- Keep your remaining piece folded as is. You should have a right angle triangle left after removing and discarding the rectangle.
- Fold in half again to make a smaller triangle
- Without unfurling, fold in half again.
- The wider end of your new triangle should have a tail with two points. Cut across to make a straight edge. You should now have a narrow triangle.
- Cut random pieces out of each side of the triangle, this will be your pattern.
- Unfold and reveal
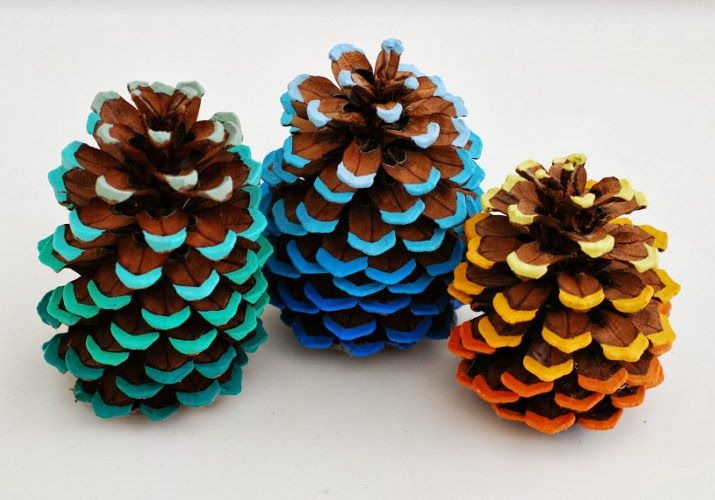
3. Painted Pine Cones
As Christmas trees don’t have flowers, it’s only right that we give them a seasonal alternative. Here are a few ideas for pine cone ornaments and home decor:
You can paint the tips of each pine cone ‘leaf’ with all one color or a variety of colors. Or you could roll your pine cone in glue and then glitter or just roll in a generous amount of glitter glue. You can make an ombre effect by using one color on the bottom row of pine cone leaves. To achieve an ombre fade, you can use a paper plate to mix the color with a touch of white, painting the next row, then mixing with more white and painting the next row, and so on so that it gets progressively lighter from bottom to top. You can push little pom poms in between the pine cone leaves to give them a polka dot effect. All you need is pine cones, art materials, and your imagination.
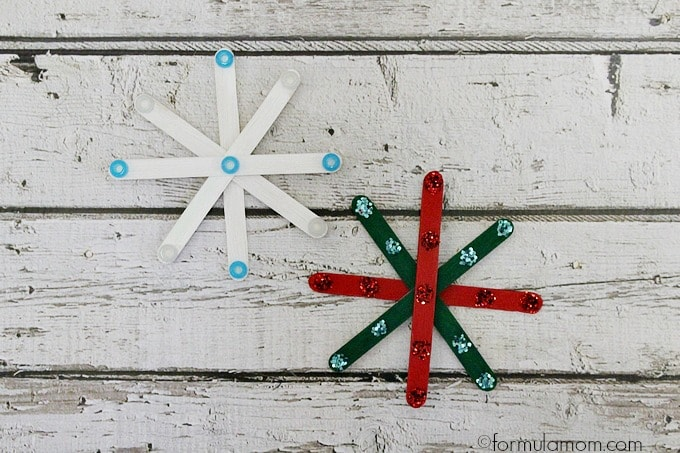
4. Popsicle Icicles
The name ‘Popsicle Icicles’ makes this DIY craft activity all the more fun. It’s quick, easy and the possibilities are endless.
You will need:
- 4 popsicle sticks for each snowflake
- Paint
- Glue
- String
- Glitter, Buttons, Sequins, etc. for decorating
Directions:
- Decorate both sides of each of your popsicle sticks as you see fit.
- Let them dry out.
- As you build your icicles, place a dab of glue in the middle of each stick to bind them all together.
- Lay one stick across the middle of another.
- Lay another popsicle stick diagonally over the two others (as above).
- Glue the final stick on the opposite diagonal direction to the last diagonal.
- Wait for your popsicle icicle to dry.
- To make a hanger for the icicle, glue or tie the string to the middle or make a hole at one end of one of the popsicle sticks and tie the string through.
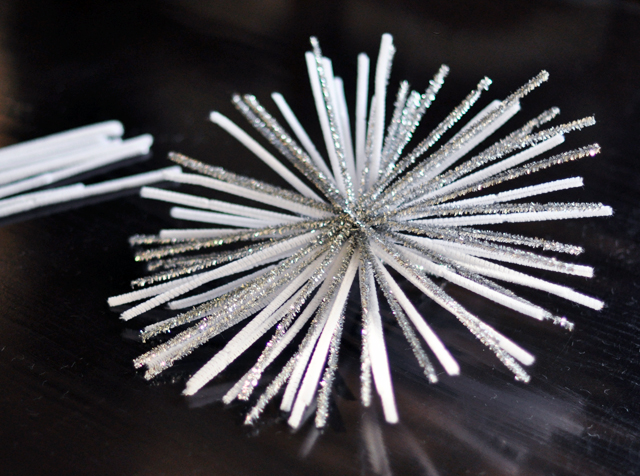
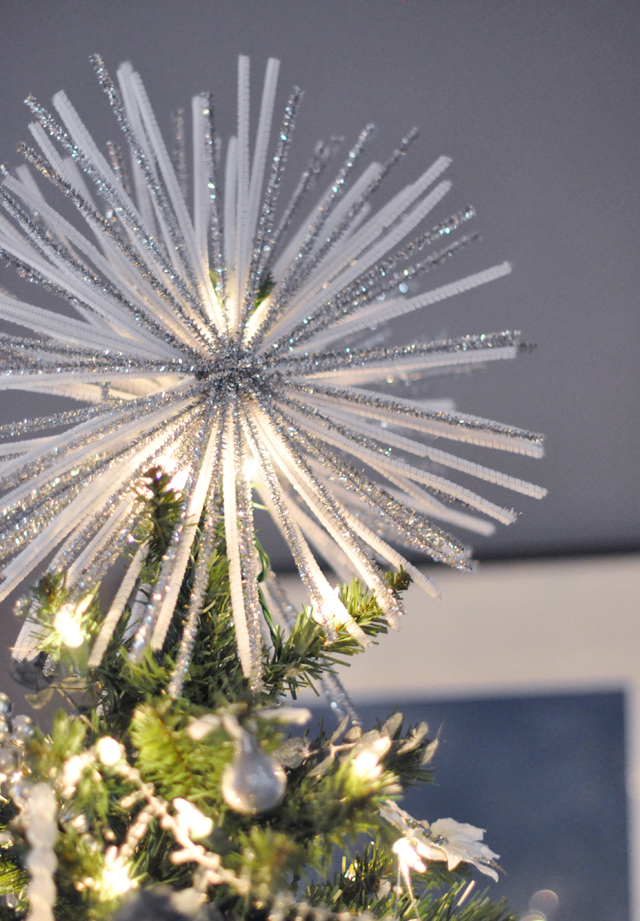
5. Starburst Tree Topper
This instructional will make a wonderful Christmas topper without any mess to clean up afterward!
You’ll need:
- 22 silver pipe cleaners
- 20 white pipe cleaners
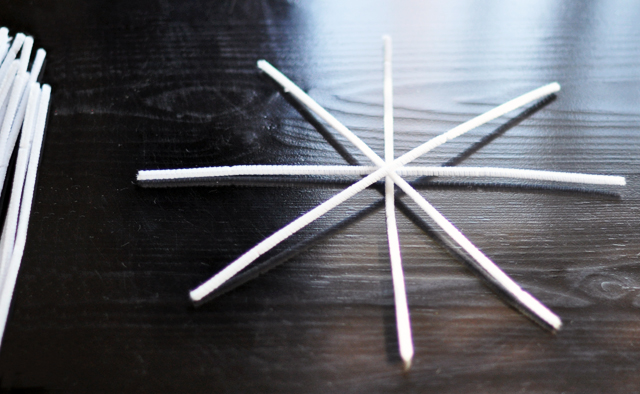
Directions:
- Take four pipe cleaners and overlap as shown above.
- Add a layer of four silver pipe cleaners in the same pattern but a little offset from the white star shape.
- Continue the above steps by alternating white and silver, until you’ve used all of your pipe cleaners but one of the silver pipe cleaners.
- Set the extra silver pipe cleaner aside.
- Gently take one end of the pipe cleaner that is at the bottom of the pile, and bend it in half over the others above it.
- Twist the bent pipe cleaner so to secure all the others in place.
- Now take the extra pipe cleaner that you set aside and twist just one end around the middle of your star, leave enough length so that it may be used as a stand for the star to secure it to the top of the tree.
- Before adding the star to the tree, start bending out your pipe cleaners until you have an orb shape.
- Now you can use the longest pipe cleaner to secure your star to the top of the tree.
- Stand back and marvel at your beauteous creation.
And there we have 5 DIY Christmas ornament activities handpicked for adults with intellectual and developmental disabilities.
About Stephen’s Place
Stephen’s Place is an independent apartment community for adults with developmental and intellectual disabilities, located in Vancouver, WA (7 minutes from Portland, OR).
If you have a loved one with developmental or intellectual disabilities, who is looking for a community to live in, please contact us for more information.
Stephen’s Place is a private-pay apartment community due to our state-of-the-art amenities and programs. We are a nonprofit and do not profit from our community. We are private pay because we spend more than some housing communities to ensure that our residents are comfortable and can safely live their lives with independence and dignity.